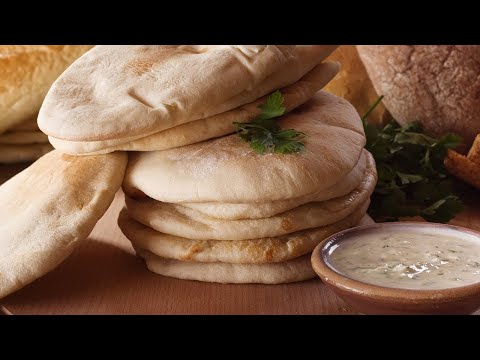
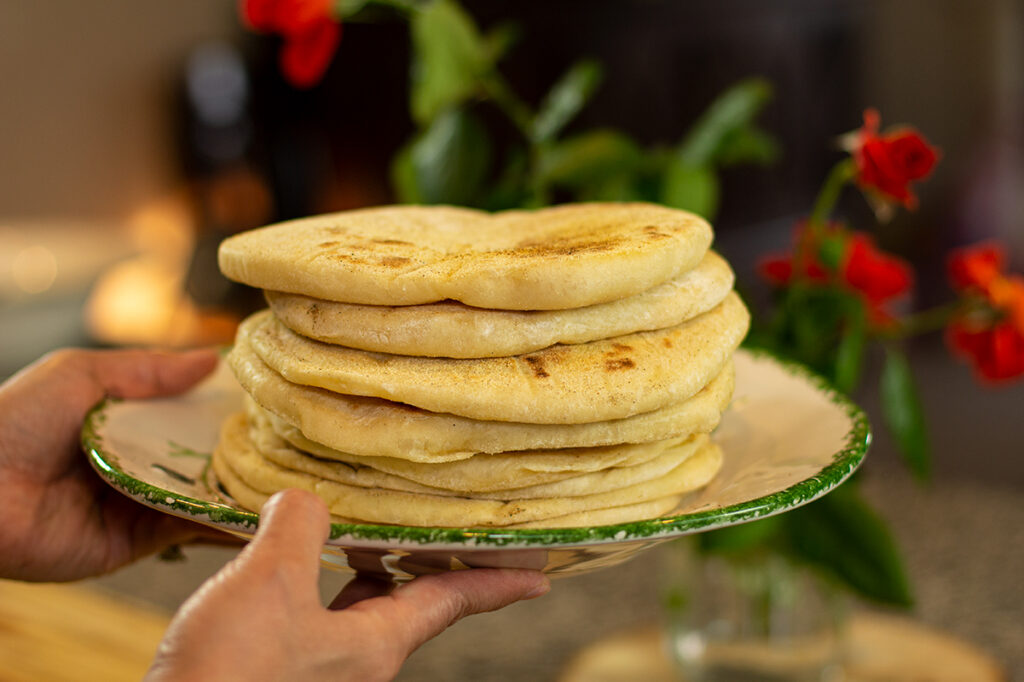
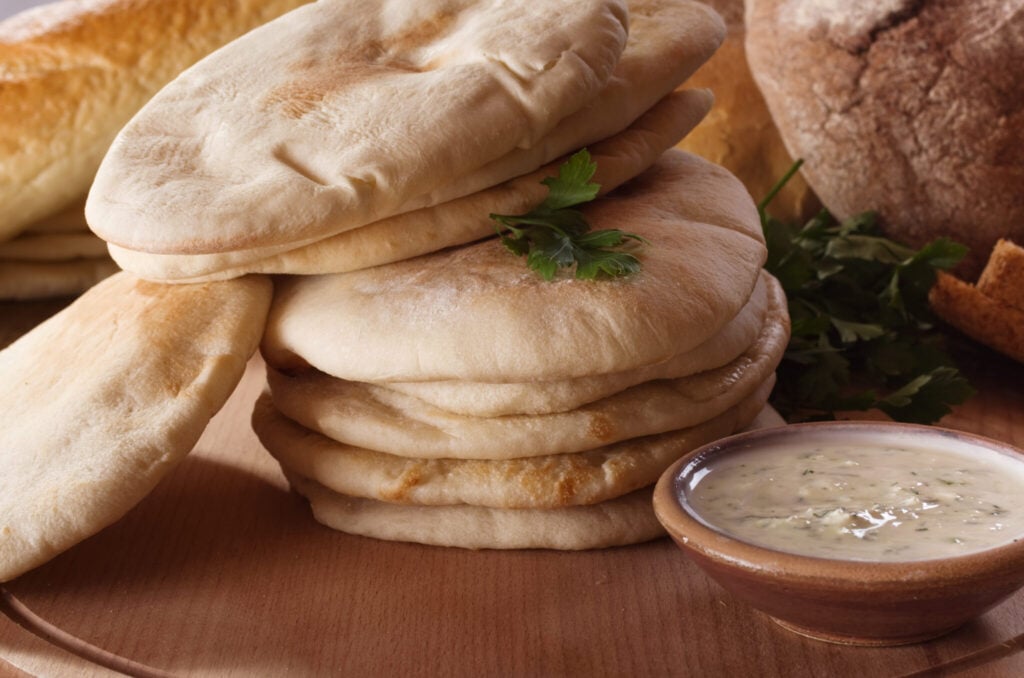
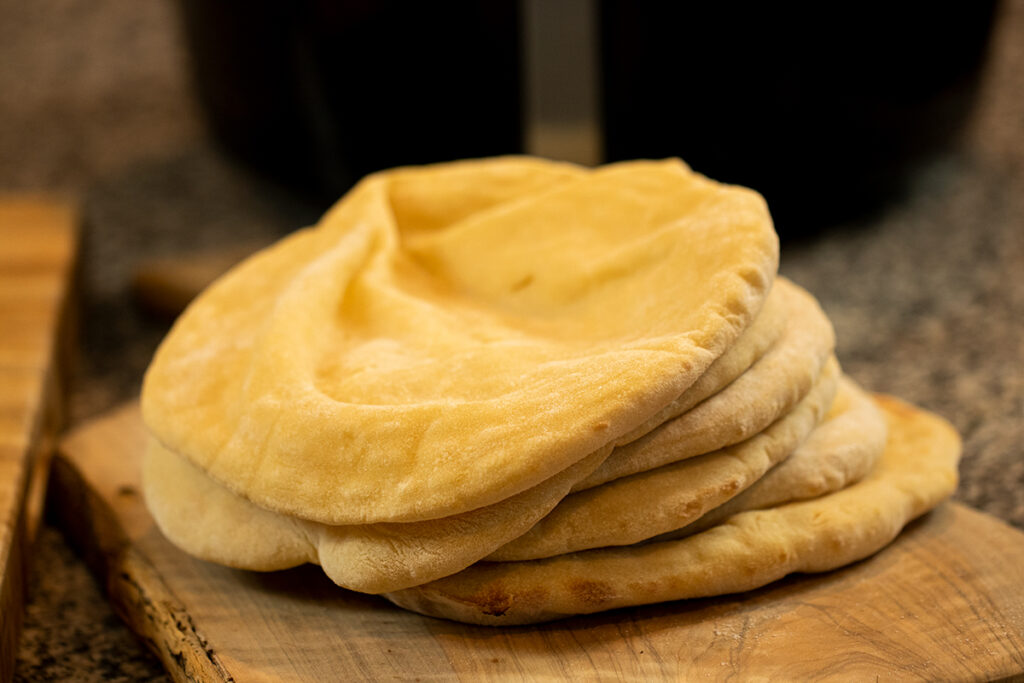
Homemade pita pockets are superior to any store-bought variety. They’re soft, fluffy, aromatic, and the most delicious pita that you will ever eat. Pita dough is the easiest to make and very inexpensive. This recipe makes 10 pitas to use for filling with your favorite things: gyro, chicken, falafel, and even tuna fish. Set them out alongside dips and veggies and enjoy!
Watch the Video Tutorial here:
This is the same exact recipe that I posted a few posts back. Learn how to make pita pockets on the stovetop right over here.
This time, I wanted to see if the pitas would turn out just as soft and fluffy but in less than half the time. And, yes!!! they did.
All that is needed to create the pitas in the oven are a few baking trays, some parchment paper (for easy clean-up), and an oven. That’s it! You can make the dough by hand in a big mixing bowl. However, if you own a tabletop mixer like my favorite Kitchen Aid, then, by all means, use it. It surely is a time-saver.
Purchase your kitchen essentials using my affiliate links to support my work without costing you anything extra. Thank you!
What is the difference between pitas made on the stovetop vs the oven-baked kind?
The main difference is color. The pitas that are cooked on the stovetop are more golden. The pitas that come out of the oven are pale. Otherwise, they taste exactly the same! Soft and delicious.
A word of caution:
If your oven is situated under your stovetop or anywhere close to the ground, be careful! Protect your face, specifically your lashes (if you wear mascara, take extra care) and look away when you open that oven’s door. The heat comes out like lightning and if you don’t move your face away, you might lose some lashes. haha! All joking aside, this is a real danger and you should take this precaution seriously so that you do not hurt yourself.
What temperature should I bake the pitas at?
My oven goes up to 525°F, 270 °C. So, between 525 to 550 degrees will be perfect. The pitas that are closest to the heating element (mine is at the bottom of my oven) cook the fastest. SO, keep an eye on them.
How long do they take to bake?
4 minutes. Keep in mind that oven temperatures vary and some may take longer and others might be ready a minute sooner. As soon as they puff up (balloon) take them out. The only time that I would cook them a minute longer would be if I was serving them (all of them)immediately after they’re baked.
Otherwise, take them out and reheat them in the oven, a toaster, or even a grill before serving. This will help them stay soft.
How to store the baked pita pockets:
Cool them completely then, transfer the pitas to freezer safe bags. They will keep fresh up to a week in the refrigerator and for 3 months in the freezer.
The Air-Fryer Method:
Pita Pockets can easily be made in the air-fryer. Make the dough and shape the pitas.
Preheat the Air-fryer to 400 °F and place one pita inside of the basket. Cook for 4 minutes. Resist the urge to flip the pitas over halfway through cooking or they might not create the pockets.
If they puff up at the 3 minute mark then, flip the pita over to cook on the other side for the final minute of cooking.
Watch the Air-Fryer Method Video:

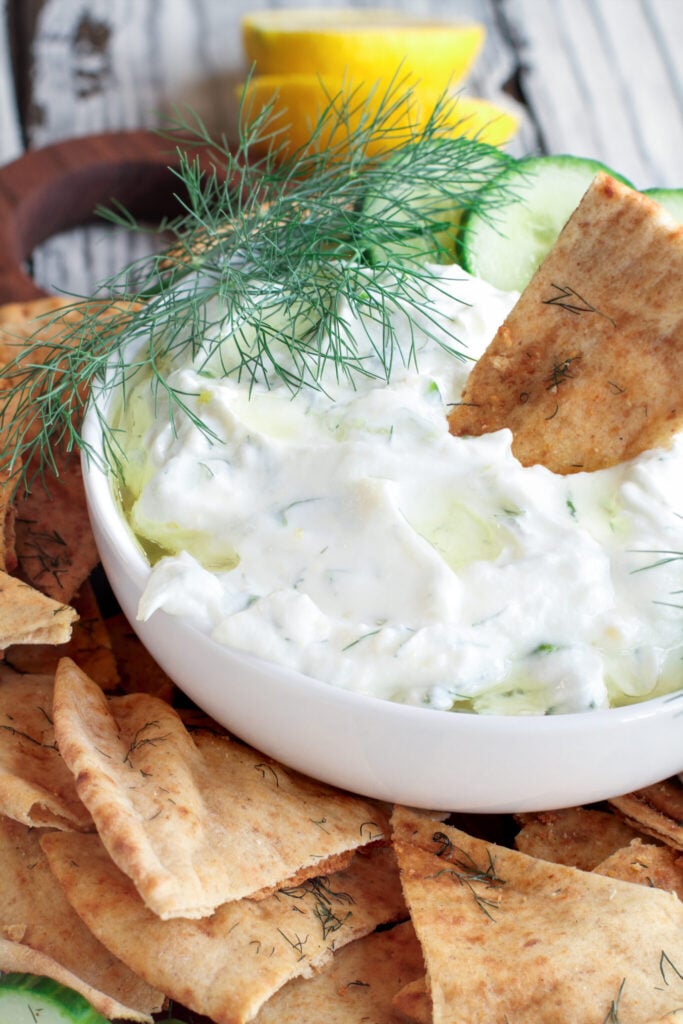
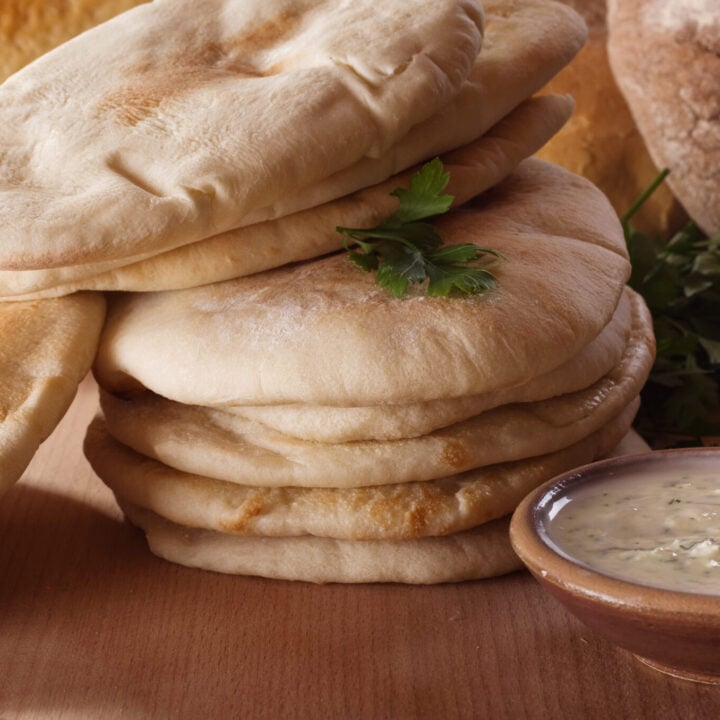
Fill the pitas with Gyro meat, grilled chicken, falafel, or your favorite things. Use leftover pitas to make pita chips and serve them alongside tzatziki or your favorite dips.
I hope you give this pita recipe a try and I would love to hear what you think. Share your recreations with me on Instagram & Facebook. See you soon!
The Softest Pita Pocket Recipe: The Oven Method
Homemade pita pockets are superior to any store-bought variety. They're soft, fluffy, aromatic, and the most delicious pita that you will ever eat. Pita dough is the easiest to make and very inexpensive. This recipe makes 10 pitas to use for filling with your favorite things: gyro, chicken, falafel, and even tuna fish. Set them out alongside dips and veggies and enjoy!
Ingredients
- The Dry Ingredients:
- • 4 and ¼ cups (648 g) all-purpose flour
- • 2 teaspoons salt
- The Wet Ingredients:
- • 1 cup (250 ml) lukewarm water
- • 1 cup (250 ml) lukewarm whole milk
- • 2 teaspoons active dry yeast
- • 1 tablespoon all-purpose flour
- • 2 teaspoons granulated sugar
- • 2 tablespoons olive oil
Instructions
- Combine the dry ingredients in a large bowl and whisk together. Set aside.
- In the bowl of a tabletop mixer that is fitted with the dough hook attachment, add all of the wet ingredients except for the olive oil. Allow the yeast to activate for 8 minutes. As soon as a puffy cloud forms at the top of the mixture, the yeast is active.
- Add the olive oil along with all of the dry ingredients and knead on low speed for 12 minutes.
- Lightly grease a large bowl with 1-2 tablespoons of olive oil and transfer the dough to the bowl. Toss to coat in oil and cover with plastic wrap. Set aside in the warmest room of your home to rise until doubled in volume. About 1 hour.
- Preheat the oven to 525 °F, 270 °C.
- Cut the dough into 10 equal portions.
- Lightly flour your work surface and roll each portion of dough out into about 6-7-inch circles. Keep their thickness even. Use as much flour as needed to roll them out evenly.
- Line 3 baking trays with parchment paper and sprinkle some semolina flour on top if desired.
- Place 3 pitas on each baking tray.
- Cover the dough with a clean kitchen towel and allow it to rise for 30 minutes.
- Bake the trays in the preheated oven for approximately 4 minutes or until the pockets are formed.
- Transfer the pitas to a plate and serve immediately.
- Leftover pitas can be stored in an airtight bag or container and kept in the freezer or the refrigerator until ready to use.
Notes
To make whole wheat pitas, substitute 2 cups of whole wheat flour for 2 cups of all-purpose flour. This dough can be kneaded by hand. Knead it until it is no longer sticky. It should stay soft and tacky.
Can you make the pita without milk and double the water? I have an allergy to dairy. Thanks.
you can use soy milk!
I made these and they are great, so soft and hubby enjoyed them with his kebabs and salad. Xx
These pitas are amazing, so soft and fluffy. They are the best pitas I have ever tasted! It’s hard to go back to store bought pitas after these. Another great recipe from Dimitras! Thank you!
First time making Pitas of any sort. Not very experienced with breads in general. The dough was so sticky, I thought I did something wrong; however, they turned out nearly perfect and the dough felt great once balled up and rolling out.
The only issue I had was that some were a bit doughy on the bottom. I did not use a pizza stone, but I have a convection oven that goes to 550 (525 for convection), so I thought that would make up for it. I think if I used baking sheets without sides, that might take care of the issue as there would be nearly full air circulation. I ended up flipping some and putting them back in the oven for 1 minute. All were completely edible, super yummy and much better than general store bought pitas! Thank you for the video and the ‘what not to do’ section. Very helpful!!
just tried these and they came out beautifully. a few not fully puffed but who cares! i made a half recipe which gave me 6 good sized pitas. i made your stove top ones the other day and was not as successful (not enough flour while rolling out and they had a few minute tears which let the steam out – hence not being able to puff up), but they were delicious as a dipper. even failures are a success with this recipe. i’m going to try your greek feta bread next.
your videos are very well done and informative. i watch each one a few times before i start the recipe.
…whole wheat ones … so yummy!
Hi Dimitri. I have a serious question. First again thank you for this recipe. Second. I was reading that dinner rolls can be made to the rolled ball stage then frozen for baking at a later time. I was wondering if the same might be so with the Pita at the rolled ball stage as well? Have you ever tried this and if you do not mind your thoughts would be appreciated too.
Hi Karen, I would never freeze uncooked yeasted dough. I’ve tried it and the results were horrible. I’d rather bake the rolls or bread and then freeze and reheat. Hope that helps!
Thank you for sharing this wonderful recipe. I would like to know if I’m reheating the pitas in the toaster oven, at what temperature and how long should I bake them for ?
Thank you.
Hi Helen,
350 °F for about 3-4 minutes should be good. Enjoy them!
Hi Dimitra, your pitas look delicious! I have celiac disease & wonder if I can substitute the Bob’s Red Mill 1:1 baking flour for the flour used in this recipe? That is one of the things about Mediterranean cuisine I miss, the pitas!
Thanks for your reply!
Can you substitute milk with just water?
Yes 🙂
I am a fervent follower of your blog and I love the fact that you have given air fryer instructions for the pita.
However, I would really, really appreciate it if you gave temps in centigrades as well as in Fahrenheit, please, please 🙂
These are amazing…..no more cardboard pitas from the store!
I used half WW flour and hand kneaded. Followed your directions and they came out lovely.
Really nice pockets! Yummmy!
Thank you so much for sharing this recipe ❣
I did bake it. But It were not soft. I donot why. Or because bake long. 4 min
It it popup but still white it mean cook or not
Hi
Always follow your recipe. They are normally eaten the same day.
Can I store them? Also do they freeze
Thankyou
Tim
Aww, thank you very much!! I really appreciate your support! They pitas can be frozen after they’re baked and cooled completely. I transfer them to a freezer-safe bag and they keep fresh for 1-2 months 🙂
Is the 12min of kneading with a Kitchen Aid mixer Or by hand ? I make mine with a mixer & usually after 7-8min it appears kneaded enough. Made this several times, but have difficulty rolling the dough out, so not sure about kneading time? They always bake up nicely with pocket & tastes wonderful. Thank you!
The amounts don’t add up. According to various online calculators 4¼ cups of flour are equal to 530g, not 650, but even with 650 the dough comes out far too wet with the amounts of milk/water listed here.
Hi Dimitra,
Just LOVE your channel, thank you for sharing your gift of cooking. We love this pita so much, can I double this recipe without compromising the quality of the pita?
Hi Dimitra. I need your input. Can I roll out soft baked pita rounds and then freeze them before rolling out to bake?
Hi! You can definitely roll out the soft baked pita rounds and freeze them. Just make sure to place parchment paper between the rounds to prevent sticking. When you’re ready to bake them, you can bake from frozen; just add a few extra minutes to the baking time. This method can help maintain the texture of the pita. Let me know how it goes!
Amazing! I’ve tried so many different recipes for pita and none “pocket” like this one. Every single one of them puffed up! This recipe is a keeper for sure!!
That’s fantastic! Nothing beats the joy of watching pitas puff up perfectly. So glad this recipe worked for you—happy baking! 😊🔥
I’ve just tried making this today and have been unable to get the mixture past the intensely sticky phase, despite adding quite a lot more plain flour. I’m going to let it rise anyway and see if it works out despite the state of the dough at this point. It could be that I just need to try again! Thanks for the recipe and YouTube video.
Thank you for trying the recipe and for sharing your experience! Sticky dough can definitely feel tricky at first, but sometimes it just needs a bit of patience and a good rise to become manageable. Letting it rise is a great idea — the texture usually improves after that. If you try again, a little extra flour while kneading can help, but be careful not to add too much to keep it soft. I’m glad the video helped, and I’m here if you need any tips!
My kids devour these! My only question is how to make them not have the flour flavor on the outside since you are supposed to to use allot to roll. Should I be dusting them off more?