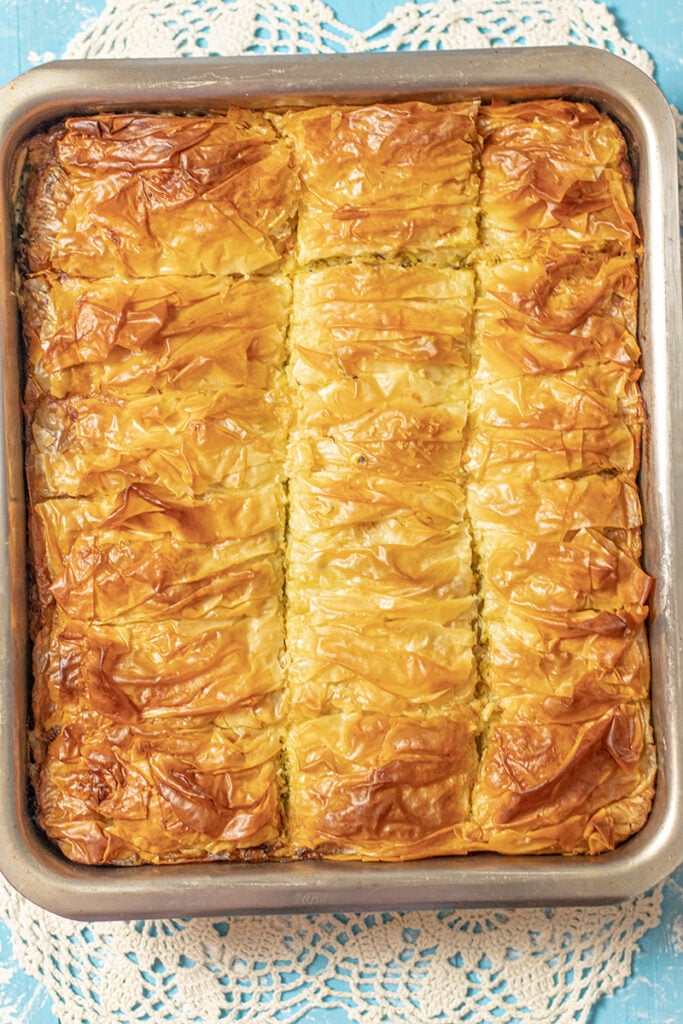
This Zucchini and Feta Pie, also known as Kolokithopita can easily stand alone as the main dish for a party. The flaky, buttery phyllo holds a fresh-tasting and flavorful filling that’s made with loads of zucchini, herbs, and cheese. Serve it alongside any main course or as the star of your dinner party. A definite crowd pleaser!
What is Kolokithopita?
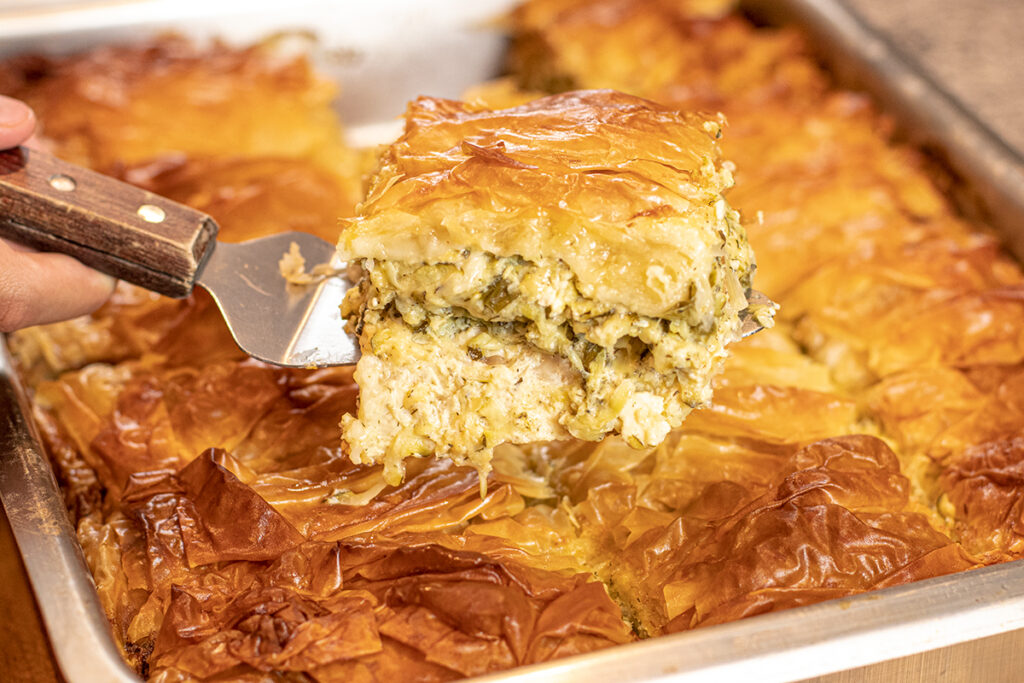
Kolokithopita is a popular Greek pie that is made with fresh zucchini, feta cheese, and herbs. I like to add some shredded Gouda to my pies for more depth of flavor. The phyllo is buttery, crisp, and flaky.
I’ve used this recipe to create kolokithopita spirals and round pies. Of course, you can use it to make mini triangles which would be perfect party food. If you’d like a tutorial, let me know in the comments and I will post it here.

Ingredients for the Zucchini Pie filling:
- grated zucchini
- feta cheese, crumbled (always buy the feta block and crumble it yourself)
- shredded Gouda cheese (substitutes: mozzarella, gruyere, cheddar
- scallions
- eggs
- mint
- dill
- salt & pepper
Can this Zucchini Pie be made ahead of time?
Yes! The fact that the kolokithopita can be made ahead makes it perfect for entertaining.
For the Freezer: Assemble the pie and place in the freezer for an hour so that the butter/oil solidifies. Wrap with plastic and freeze for up to 2-3 months. Thaw in the refrigerator overnight and remove the plastic. Bake in the oven as per the recipe’s instructions. To bake the pie frozen, preheat the oven to 350 °F and cover the pie with foil. Bake covered for 1 hour. Remove the foil and bake for another hour or until the pie is golden brown.
Day-Ahead Instructions: Bake the pie and allow it to cool completely. Cover it with foil and refrigerate. Preheat the oven to 350 °F, 180 °C and warm through until crisp. About 20 minutes. I prefer this method when serving at a party because you don’t have to worry about allowing the pie to set for at least an hour. Just warm through and serve. Easy peasy!
Tips for How to make Kolokithopita for a Crowd
- There’s a lot of zucchini in this recipe and zucchini contains tons of moisture. Therefore it is crucial to drain it properly. Once the zucchini is grated, sprinkle it with salt and place it in a colander to drain. You can do this in the sink or over a bowl if you’d like to preserve the liquid for soups and stews. 15 minutes will be enough and you will be very surprised to see how much liquid id released. But don’t stop there! Take handfuls of the zucchini and squeeze it to drain more liquid then place the strained zucchini in a very large mixing bowl.
- Add all of the remaining ingredients except for the eggs. Mix together and taste for the seasoning. Add more salt and pepper if needed then add the eggs. This way the pie will be properly seasoned without having to taste raw eggs😀
- The phyllo is usually sold frozen so to properly thaw it out, leave it (inside of its packaging) overnight in the refrigerator and then at room temperature for an hour or two. Make sure to leave it inside its packaging so that the pastry sheets do not dry out.
- Use salted butter if possible. Otherwise, melt unsalted butter and then season it with a half teaspoon of salt for added flavor.
- Assemble the pie and bake it until golden.
- The filling will appear loose and as if there’s too much liquid. Don’t worry. Set it aside to cool for at least an hour. After that, it can be served. However, I suggest making this the day before and reheating it before serving.
I hope that you give this recipe a try and let me know what you think. Share delicious meals with your loved ones to create beautiful long-lasting memories. Kali Orexi and I will be back soon with another recipe worth sharing 😊
Watch the Video Here

Zucchini & Feta Pie (Kolokithopita) to Feed a Crowd
This Zucchini and Feta Pie. also known as Kolokithopita can easily stand alone as the main dish for a party. The flaky, buttery phyllo holds a fresh-tasting and flavorful filling that's made with loads of zucchini, herbs, and cheese. Serve it alongside any main course or as the star of your dinner party. A definite crowd pleaser!
Ingredients
- 1 pound (#4) phyllo pastry, thawed
- 12 oz. salted butter, melted
- 1 cup unseasoned breadcrumbs
For the Filling:
- 10 zucchinis, grated (approximately 200g each zucchini)
- 16 ounces feta cheese, crumbled
- 12 ounces shredded gouda cheese, parmesan, or mozzarella
- 8 scallions, thinly sliced
- 6 eggs, lightly beaten
- 1/2 cup finely chopped mint
- 2 teaspoons dried dill
- Salt and pepper, to taste
Instructions
Preheat the oven to 400 °F, 200 °C.
Make the filling:
Place the grated zucchini in a colander and sprinkle with ½ teaspoon of salt. Toss to coat and set aside either in the sink or over a large bowl to catch the liquid that drains. Set aside for at least 30 minutes. Squeeze the zucchini with your hands to release as much of the liquid as possible.
Place the strained zucchini in a large mixing bowl.
Add all of the remaining filling ingredients except for the eggs and mix well. Taste and adjust the seasoning if needed.
Add the eggs and mix well to combine.
Assemble the pie:
Sprinkle the breadcrumbs into a large baking pan to create an even layer.
Take a stack of 3 sheets of phyllo and place it in the pan to cover the bottom and let the rest of the stack hang over the side of the pan. Drizzle the top sheet with some melted butter.
Place 2 sheets half in the pan and half hanging outside of the pan on all four sides of the pan. Drizzle butter between the layers. See the video above.
Spread all of the filling inside of the phyllo sheets. All of the sheets that are hanging outside of the pan should go over the filling. Place all of the filling inside of the phyllo and fold the phyllo that is hanging outside of the pan over the filling brushing butter in between the layers.
Reserve 6-7 sheets of phyllo for the topping and place the remaining sheets over the filling. Drizzle with some butter.
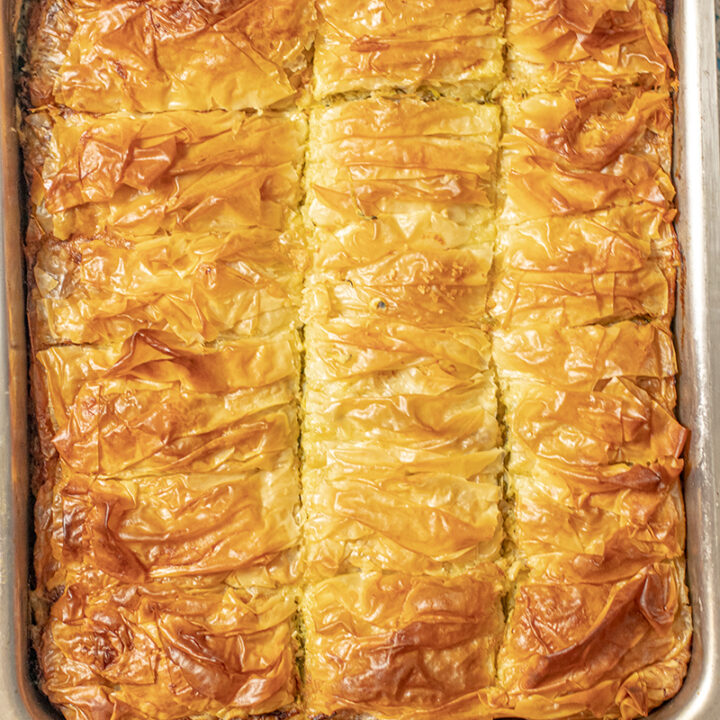
Take one sheet at a time and crinkle it like an accordion and place it on top. Continue creating accordions and place them side by side until the top is covered. Drizzle with butter and score into pieces.
Pour the remaining melted butter on top and brush all around.
Bake the pie:
Place the pie pan onto a baking sheet and bake on the center rack for 60-75 minutes.
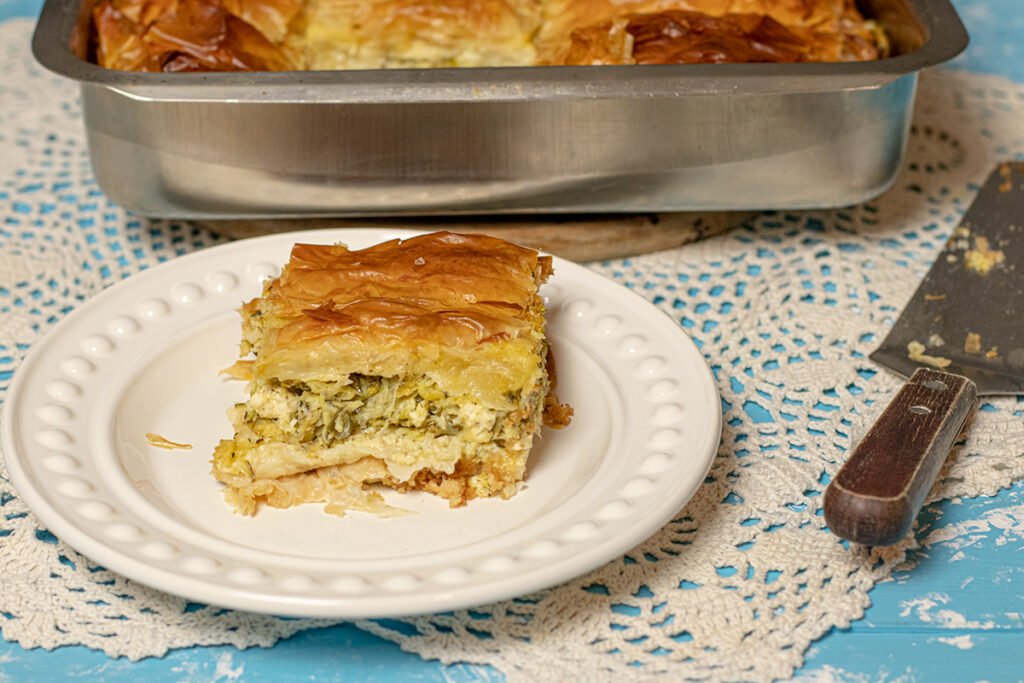
Allow the pie to rest at room temperature for at least 20 minutes so that the filling can set.
Serve with a salad and creamy tzatziki. Enjoy!
Notes
Make-ahead freezer instructions: assemble the pie and place in the freezer. Once the butter chills and hardens, wrap the pie with plastic wrap and then with aluminum foil. The pie will keep fresh for up to 3 months. Thaw overnight in the refrigerator and remove the plastic.
Bake as per the recipe instructions except, cover it with foil for the first 30 minutes and uncover for the remaining time.
Recommended Products
As an Amazon Associate and member of other affiliate programs, I earn from qualifying purchases.


I love all your recipes thanks so much keep them coming!
What size baking tray can I use. I’ve searched everywhere and kind find this?
Hi Dimi,
When you specify the approximate number of whatever it is in the recipes.
Please approximate the weight or number of cups
For example just saying 10 zucchini could be 3 lbs. or 6lbs.
That’s not enough. Please tell the weight/volume.
Thank you. I love your recipes.
Answering the two questions below would be helpful. Having a video that really is operational would be great.
Each zucchini should be about 200 grams. I’ve used larger ones too…
What size pan is this recipe for?
Really good ‘n’ cheezy! Freezes and reheats like a champ. My first Dimitra dish, and it came out quite good!
Tip: Instead of a grater, if you have a food processor with a shredding wheel attachment, the zucchini and cheese grating are MUCH less time consuming!
Here are some answers to a couple of the questions, above….
– 200 g zucchinis are 7.05 oz, so total quantity for recipe should be 4.41 lbs (weigh out quantity at the store)
– Pan that worked perfectly for me is a lasagna pan (14 x 10-inch)
Thank you!!
Can I use yellow squash instead of zucchini? I have an over abundance of yellow squash and trying to find ideas to use it.